Desserts

Fruit Trifle

After a long early morning bike ride, while we were catching our breath in a coffee shop and chatting, my good friend Alanna mentioned she was having 12 friends over for dinner and still needed a dessert that would not require a long bike ride to be guilt-free. We were too tired to start messing up her clean kitchen by flinging pots and pans around and cooking something. Besides, she is one of those marvelously organized people who has her table set, her meal organized and the kitchen clean the night before.

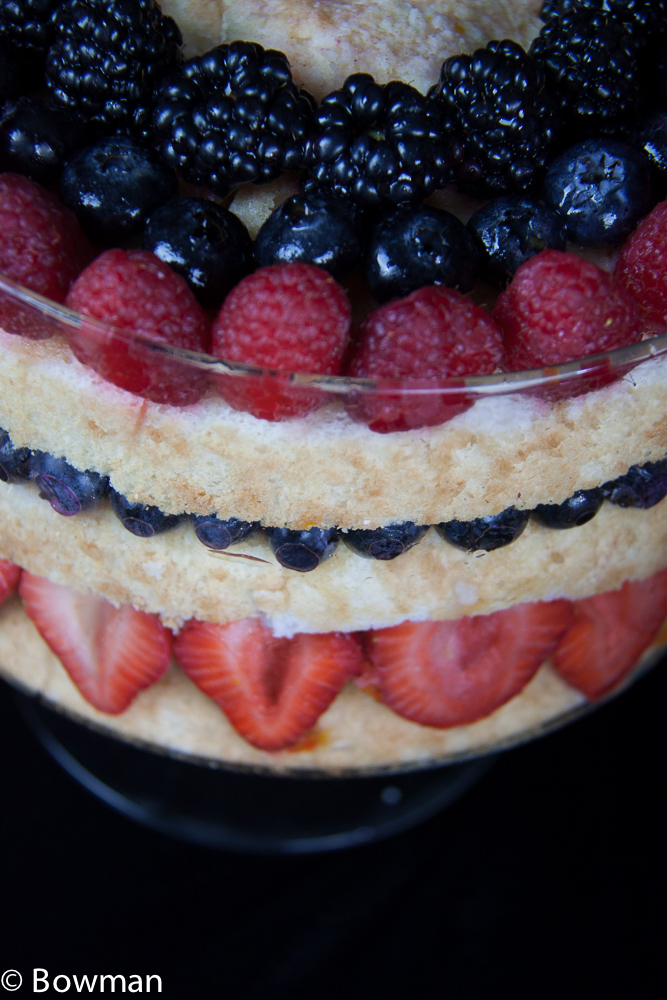
We came up with a brilliant idea that is also easy: a fruit trifle. This version has no custard so it’s really quick to make. Alanna went to the store and bought an angel food cake, lots of beautiful berries and a little heavy cream. I dashed home and made the citrus syrup from my North African Orange Cake recipe.

Alanna brought out a beautiful glass trifle bowl that we created the trifle in, though any glass bowl or even individual ramekins would work. It only took a couple of minutes, and, as my fiddler friend says, viola! A great looking and great tasting dessert – hardly a trifle!

Fruit Trifle

Ingredients

The amounts depend on the size of your serving bowl.

1    store bought angel food cake

3     pints of hulled strawberries (about 1½ pounds) and enough cut in half to ring your bowl and the rest roughly chopped

3   dry pints of blueberries

1   dry pint of blackberries

1   dry pint of raspberries

1    pint of heavy cream

2T   Grand Marnier or other orange flavored liquor

3T   white sugar

Citrus syrup

juice of 1 orange

juice of 1 lemon

1/3c sugar

2T    Grand Marnier or other orange liquor

2     cloves

1     cinnamon stick (or ½ tsp cinnamon powder)

Utensils

Glass bowl, measuring spoons, measuring cup

Method

Make the syrup first by mixing all the ingredients together in a small saucepan and simmer for 2 minutes. Set aside to cool while you prepare the rest of the ingredients for use.

Cut the angel food cake into 1 inch layers saving 3 layers for the trifle and using the rest to fill the center hole. To start to assembly the fruit trifle, place the first layer of cake in the bottom of the bowl, fill the center with pieces of cake then brushed the top of the cake generously with the citrus syrup. On top of this add a layer strawberries, with half cut ones pressed against the outside of the bowl to look beautiful, and the roughly chopped ones filling the inside. Brush the orange syrup over the strawberries and then add another layer of cake, orange syrup and then a layer of blueberries, building the layers. You get the idea.

The final layer at the top of the bowl is raspberries on the outside, with a ring of blueberries and blackberries inside.

Allow the fruit trifle to sit to soak in all those great flavors for 30 minutes up to a few hours.

Whip the heavy cream till it starts to thicken, adding the sugar slowly, then the Grand Marnier. Whip until soft peaks form. You can do this several hours ahead and store, covered, in the refrigerator until ready to serve.

To serve pile a good dollop of the whipped cream into the center of the trifle and put the rest in a serving bowl with a spoon for your guests to add a bit more on their fruit trifle as they choose. Continue Reading

Soup

Cool Avocado and Cucumber Soup

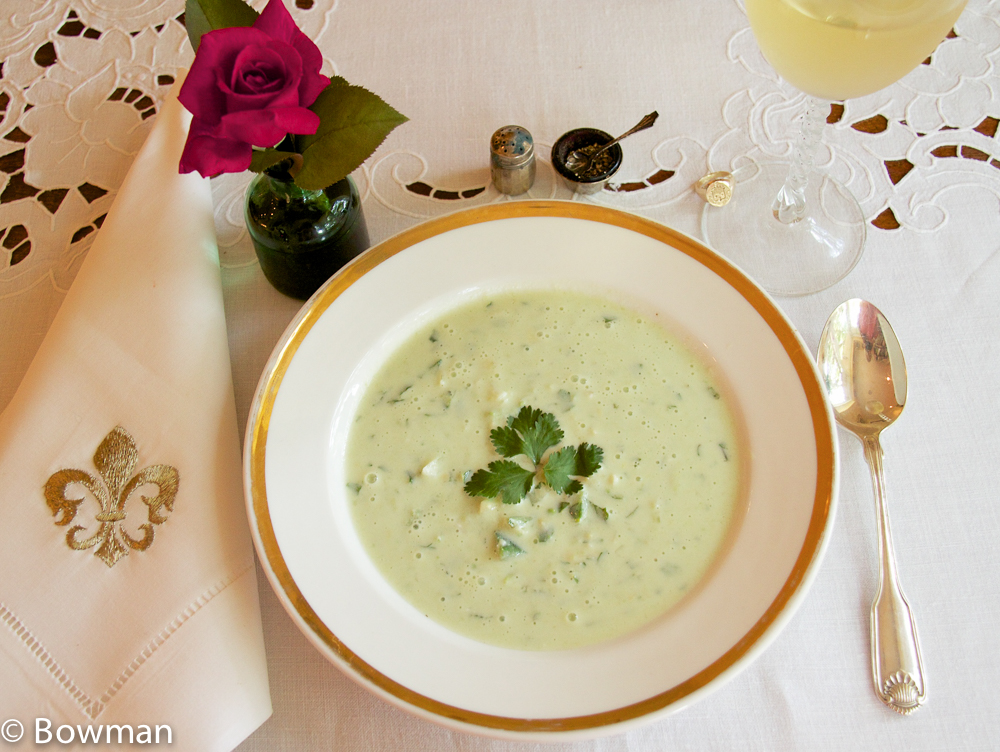
The temperature is hovering at 100F here.  I don’t even want to think about turning on the stove. When it’s too hot to cook, chilled soup with a sparkling glass of wine makes a lovely, refreshing meal. This soup is so elegant in its simplicity and flavor that it begs for a crisp white tablecloth and a baguette with cold salted butter. Add a few pieces of grilled shrimp, chicken or scallops and you have a special meal with no fuss.

20140813 Cucumbers for soup_MG_8579

All you do is throw everything in the blender and in less than a minute it’s done. I like a bit of texture in my soups. With this cool avocado and cucumber soup, I don’t puree it to complete smoothness which you might want to do. And remember: with chilled food you usually need a bit more salt than you might think. Enjoy!

Cool Avocado and Cucumber Soup

Ingredients

2 medium cucumbers, peeled and chopped.
1 avocado
1/2 cup plain Greek yogurt
1 jalapeño pepper, seeded and roughly chopped. Sometimes I roast the jalapeño which gives the soup a slightly richer flavor.
1 1/4 cups ice-cold water
1 clove garlic, roughly chopped
1 small shallot chopped
3 tablespoons chopped cilantro, mint or dill
2 tablespoons lime juice
1 1/2 tablespoons sugar
1 1/2 teaspoons salt
1/4 teaspoon pepper

Utensils

Blender or food processor, measuring spoons

Method

Now the easy part:

Place everything in a blender or food processor and process until smooth. Add more cold water if you need to thin the soup to your desired consistency. Season again with salt and pepper if needed. Because it is served cold, this soup might need a bit more salt than you are used to using. Chill in the refrigerator for about 1 hour before serving.  I have been known to put the cool avocado and cucumber soup in a bowl in the freezer for 20 to 30 minutes stirring occasionally to serve it sooner. Taste before serving to make sure the seasonings are balanced.

Garnish with sprig of mint or couple of cilantro leaves.

Make Cool Avocado and Cucumber Soup a meal by adding chopped tomatoes, a couple of grilled shrimp or scallops or even a few pieces of roasted chicken. Make an arrangement of the tomatoes, cilantro and grilled shrimp/scallop/chicken in the middle of the soup.

Editors note: I’ve made this several times lately and occasionally I needed to add a bit more sugar if it is too tart. Enjoy!


Tips

Cooking and Organization in a Small Space

What makes cooking different and difficult in a small space is that there is little room to store food or equipment and counter space is quite limited. Restocking from Costco and Sam’s is probably out! Some tips:

  1. What do you really need when you cook?

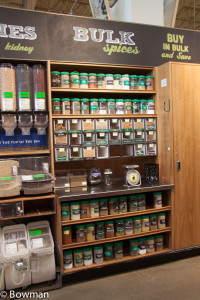
I have a small selection of essentials I take with me when we take off sailing for a few weeks. First and foremost, I always take my knives – chef, boning, paring, and maybe a bread knife (I sometimes do this when I go to cook at a friend’s too :-)). Next I take my grater or micro-plane, my nifty peelers and an immersion blender. I also take a whisk and four ramekins – see multi-tasking tools below. Even herbs and spices get pared down. In small zip lock bags I take cumin, smoked paprika, garlic powder, thyme, oregano, and other herbs and spices dictated by the cuisine where we’re sailing such as curry in the BVIs, and Old Bay in the Chesapeake. At home you will want the basic herbs and spices you use often.  For special spices and herbs for a particular recipe, look for a store like Whole Foods that sells herbs and spices in bulk containers and buy small amounts. It’s cheaper and there are no jars jamming up your storage space and not being used.

20150812 Whole Food bulk _MG_2627.CT2

At home I have a bit more space, so the “essential” list is longer. My husband gave me a bit of good advice – put what you use the most within easy reach and only then consider the rest. It actually makes my shelves and drawers aesthetically pleasing as well as workable. Luckily there are shelves in our garage where I store the things I use less often but can’t part with. If I keep pulling an item from the garage, it can come back in. Conversely, if I don’t use an item in the kitchen for 6 months, it goes outside or to the give-away pile.

  1. Tools must multitask

My ancient 6” wire strainer doubles as my sifter. My big salad bowl is my large mixing bowl. I use a metal teaspoon as a melon baller. I use four ceramic ramekins for prepping bowls, poaching eggs, making individual fruit crisps and for baking muffins and popovers.

  1. Look for other surfaces that can double as counter space

When I’m cooking I use the boat’s main table and at home my kitchen table as extra counter space. If you don’t have room for a kitchen table where you live, what about a roll-around cart with a wooden top that you can use as extra counter space?

 I use my grill as an extra oven and cooktop, both on the boat and at, home for two reasons. The summers can be extremely hot in my part of the country and in most of the places where we sail. I don’t want to turn on the cook top or oven because it heats up the house or boat too much. One summer it was over 103F for more than a month and I did all my cooking on the grill. The other reason is that using the grill this way expands what I can prepare by allowing me to do more in parallel. You might use a counter top oven or microwave, which you can tuck away when not needed.

What can you do to cook more efficiently in a small space?

  1. First, simplify what you cook

 If you have the two burners like on the Bavaria 42 that we sailed on my last trip to Grenada, it limits what and how you can cook. But there are ways around this: one night a friend took one burner for roasting vegetables while I cooked pork chops with a dark rum sauce on the other burner. The wind was howling so we could not use the grill but it all worked out well.

  1. Read through your recipes to see what you’ll need before you start cooking

Get everything prepped before you start cooking. Think ahead – do you need chopped and sautéed onions in more than one dish? Do you need onions in anything you’ve planned for the next day? Chop all the onions you’ll need, once.

  1. Have a trash receptacle right at hand

 I usually have a small trash can or bag by my feet to clean up my workspace as I go. A dog works almost as well but needs more maintenance.

  1. Clean as you go

I have a sink filled with soapy water waiting while I cook so I can get ahead of the cleaning game. It also makes it easy to rinse and reuse a bowl or knife and ends up using less water than a running faucet.


Shrimp

Quick Shrimp Creole

Shrimp Creole Dish

Quick Shrimp Creole

I just spent a week competing in a regatta on the Gulf Coast. A lot of the area around Bay St. Louis, site of the regatta, was wiped out during Katrina a decade ago. While there are still foundation slabs sitting derelict on patches of ground, the community is rebuilding and the bare slabs are now in the minority. If you have time, go down and see this thriving community. They sure know how to eat well and have fun.

The food was great and the old southern hospitality welcoming. I miss living in places like New Orleans and the Gulf Coast where every neighborhood joint has great food and where eating well was an important part of life before the foodie craze. Don’t get me wrong – it is wonderful that an interest in food – good food – is now a favorite pastime. But there is just something different about a place where sharing a meal is a way of life and not something done on the way to somewhere else.

I came home ready to make some of my Cajun and Creole favorites. I love to spend half a day making Shrimp Creole but that means we only have it now and again. Here is a riff on this Creole classic – Quick Shrimp Creole – that is easy enough for any evening’s dinner. I’ll share my “long version” in the future.

Quick Shrimp Creole

Ingredients

3T butter (or bacon grease for the added flavor)
2T all purpose flour
1 ½ c chicken or seafood stock
1 c diced onion
½ c green bell pepper, diced (or substitute red bell pepper)
½ c diced celery
2 garlic cloves, finely chopped
1 bay leaf
½ c ketchup (yes, ketchup)
14oz can of diced tomatoes (or two medium tomatoes, seeded and diced)
½ t cayenne
½ t smoked paprika
salt and pepper
1t dried thyme (or 2t fresh thyme chopped)
1t dried basil (or 2t fresh basil chopped)
1t dried oregano (or 2t fresh oregano chopped)
1 lb shrimp, peeled and deveined ( I use 26-30 count)

Utensils

1 large sauté pan or skillet, 2c measuring cup, teaspoon

First you make a roux :- ) Melt 3T butter in a sauté pan over medium heat. When the butter is melted, sprinkle the flour over the butter and whisk until smooth and the mixture turns a medium caramel color. Add the onion, celery and bell pepper. Cook until the onion is translucent and the celery and bell pepper have softened. Add salt and pepper to taste. Next add the garlic and sauté for 2-3 minutes more. You want to make sure the garlic is no longer raw. Clear a little space in the mixture and add the cayenne and paprika to this empty space. Within a minute or when you can smell the cayenne and paprika, stir in the ketchup, tomatoes, thyme, basil, oregano, bay leaf. Slowly add half of the stock and stir until thickened slightly. Add more stock until you get it to the desired thickness. Simmer for 10 minutes. Add the shrimp and simmer on low heat till the shrimp turns pink. Taste again and add salt and pepper, if necessary. Serve with rice.

This quick shrimp creole freezes well.

Biscuits, Bread, Quick Jams

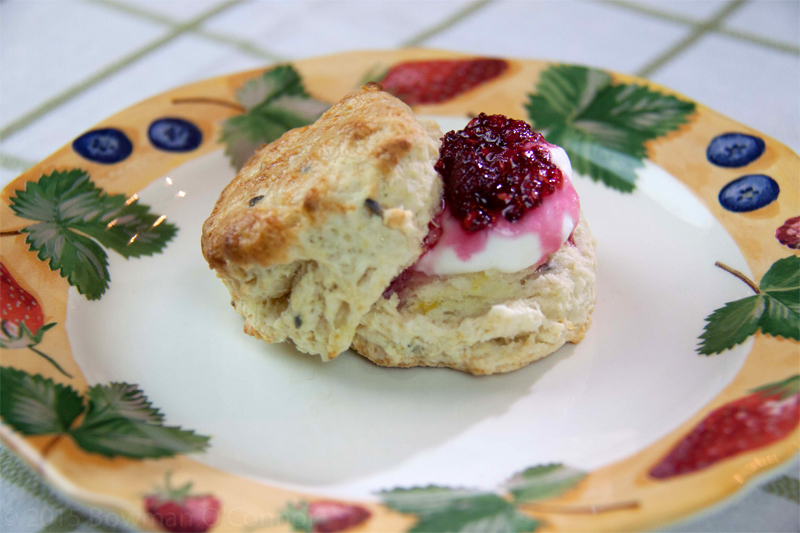
Lavender and Lemon Scones with Raspberry Jam

Homemade lavender and lemon scones with raspberry jam on your table in about 30 minutes, still warm from your oven. Oh yes!

This scone recipe is a gem. My husband is from Ireland, where, for a Texan, regardless of the time of year, it is always somewhere between chilly and downright cold. But the tea is hot and strong and the pastries grand. I don’t think I will ever make a loaf of soda bread as well as my mother-in-law, Mae. So, I’ve concentrated on making a great scone. There is one shop in Collooney in County Sligo that has the best scones I’ve ever had. I’ve been trying for years to get the crumbly lightness, rise and flavor of those scones when I make mine. With this recipe I think I’m almost there – even the dough is so good it is hard not to sample a bite or three as you’re rolling it out.

Today I timed myself to make sure I could actually make and serve lavender and lemon scones with freshly made raspberry jam in around 30 minutes. And I did. So, on your marks, get set, cook!

Lavender & Lemon Scones with Raspberry Jam

Turn your oven on at 350F degrees.

Raspberry Jam

Quick, simple & delicious

Ingredients

1c fresh raspberries

1c white granulated sugar

1t lemon zest (optional)

Utensil

A wide shallow ovenproof pan that will hold the amount of raspberries you use.

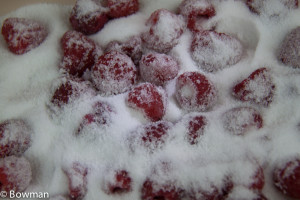
20150729 Rasberries in sugar jam_MG_1034.CR2

Mix equal parts fresh raspberries (1 cup) and white granulated sugar (1 cup) and the lemon zest in a wide shallow dish. Put the berry mix in the 350F oven for about 20 minutes. You want the mix very hot but not boiling. I set a timer so I don’t forget to check the jam after 10 minutes just to make sure it isn’t boiling. After 20 min, pour into a bowl and stir to make sure the sugar has melted. Note: This jam is runny – somewhat like a syrup.

Lavender & Lemon Scones

While you are cooking the raspberries, start on the scones. As the jam comes out of the oven, your scones will be ready to go in. This recipe makes 12 small scones.

Ingredients

2c white, all purpose flour

1T baking powder

¼ c granulated white sugar

2T lemon zest, approx. 2 medium-sized lemons

pinch of salt

4T cold butter, cut into ½ inch pieces

1 ½ tsp dried lavender or 2 tsp of fresh lavender

3/4c milk, cold

1 egg beaten with 1 tsp warm water to brush the top of the scones

Heat oven to 425 F

Utensils

1 medium to large bowl, 1 fine sieve, a 1c measuring cup, 1T measuring spoon, 1/4c measuring cup, 1 t measuring spoon, 1 liquid measuring cup, small bowl to mix the glaze, pastry creamer or two knives to mix the butter into the flour, a 2” cookie cutter, a rolling pin (optional), and a cookie sheet lined with parchment paper.

Sift the flour, baking powder, sugar and salt into the large bowl. Add the lemon zest and gently stir the lavender in. Add the butter pieces and use the pastry creamer or knives to cut the butter into the flour. You can also use the tips of your fingers and mash the flour into the butter. If you use your fingers, work quickly because you don’t want the heat from your hands to melt the butter. If you have a food processor, you can use it for this step but be careful to only pulse the motor 3 to 4 times. The flour/butter mix should resemble coarse meal when done.

Make a well in the center of the flour/butter mixture and pour in the milk all at once. Lightly hand-mix the flour and milk by stiffening five fingers in the mixture, then turning the bowl and moving your fingers in a spiral from the center of the bowl out. In a few seconds you should have the dough loosely gathered into a ball. Again, if you are using a food processor, only pulse it 3 to 4 times. Turn the dough out onto a lightly floured work area. Scrape the dough off your fingers and gather the dough into a ball.

The whole purpose of working with the dough as little as possible is to keep the scones light and crumbly.

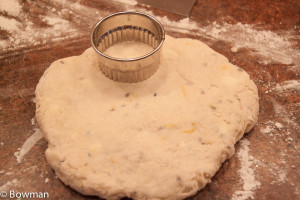
Pat or roll the dough out to a 1” thickness. Cut the dough into 2” rounds with your cookie cutter. Don’t forget to dip the cookie cutter in flour so the dough doesn’t stick to it. Be careful to go straight down and up with the cutter without twisting. This will help your scones to rise.

Biscuit Dough

Place the cut-out scones on the cookie sheet. Beat the egg with 2 tsp of warm water or milk. Brush the tops of the scones with the egg glaze. Bake in the hot oven for 10 to 12 minutes or until golden brown on top. Cool on a wire rack.

Whew! That’s all there is to it.

Sometimes I like to dip the top of the glazed scones in granulated sugar just before baking. It adds a lovely crunch.

Additional ideas for flavorings:

  • ½ heaping cup of blueberries, ½ teaspoon almond essence, 2T lemon or lime zest
  • 2T finely grated orange rind. I’ll also add 1T – 2T citrus peel
  • 4T raisins
  • 3T dried cherries
  • 1 ½ t cinnamon added to the flour before you mix in the butter. Mix ½ t of cinnamon into ¼ c of sugar to glaze the top.
  • 3T finely chopped crystallized ginger.

Today I used the same recipe and substituted ½ heaping cup of blueberries for the lavender, lime for the lemon and buttermilk for the milk. When you do this, treat the blueberries gently. If they get smashed, your scones will have a grayish tint.

Sign Up for Updates!

Don't miss a post! Sign up to be notified of new blog posts on SmallSpaceCooking.com!

Please check your email for a confirmation message.