All Posts By

Bowman O' Connor

Appetizer, Fruit, Jams, Quick Jams

Fig Jam with Rosemary and Cognac

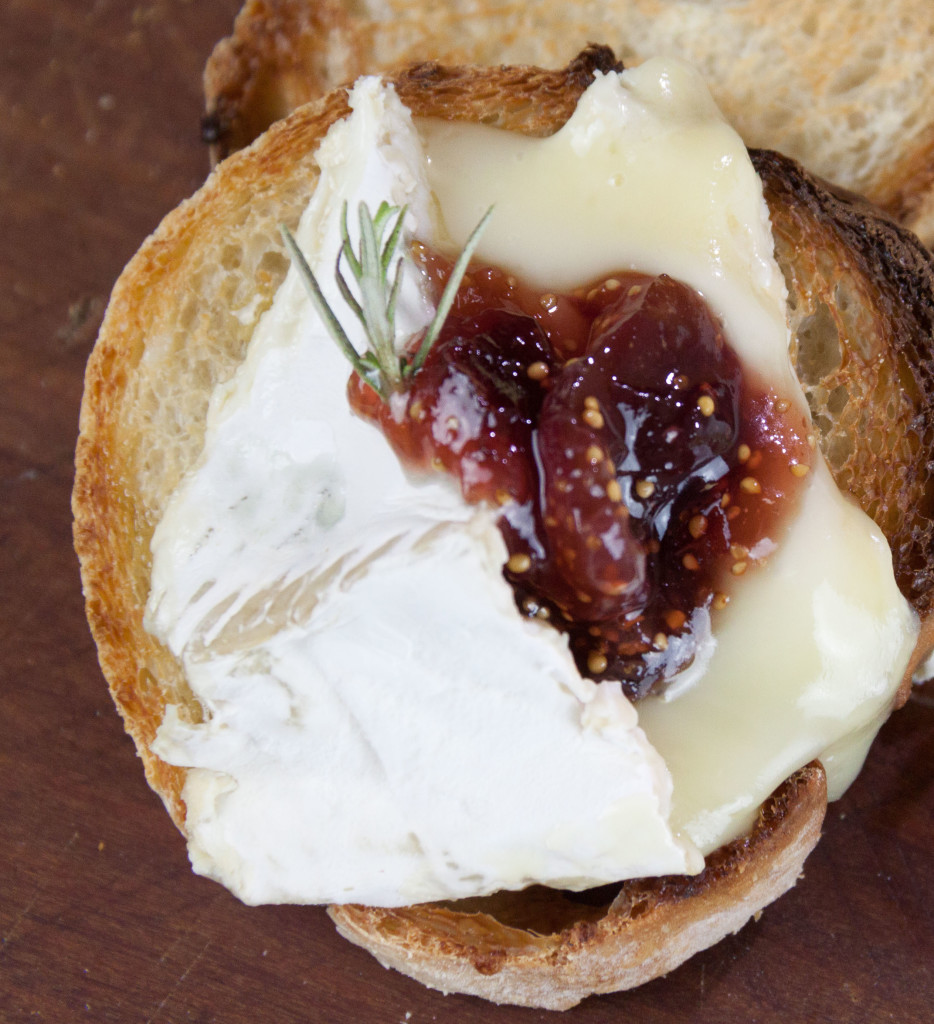
fig jam with camenbert close up_MG_2878 2Making a jam is really quite simple and easy.  You need a 12” skillet and a pot large enough to sterilize your jars. Get a few jars at your grocery store and you’re ready.  This recipe only makes two of half pints of jam – just perfect when you have a small amount of storage room.

I fell in love with figs as a small girl.  We spent the summers in an old family home on the Eastern Shore of Virginia.  There was a huge old fig bush that only produced a few figs.  I’d climb up and pick the figs and present them to my father in a bowl with fresh cream.

Making this fig jam is similar to making the base for fig ice cream.

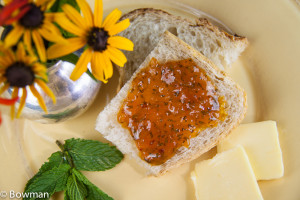
My favorite way to enjoy this jam is to warm a small wheel of Camembert cheese till it just oozes, spread it on a toasted baguette, add a dollop of fig jam and have a wonderful lunch to go along with the warm memories of my father.

This fig jam recipe only makes two half pints of jam and it only takes about 40 minutes.

Fig Jam with Rosemary and Cognac

Ingredients

1lb    black mission figs

3/4c  white sugar

The zest of one lemon

1T     lemon juice ( about half a lemon)

3”      of a sprig of rosemary

1/4c  cognac or brandy

Pinch of salt

Utensils

2 half pint preserving jars, a 12” skillet, a pot big enough when filled with water to cover the jars, and a smaller pot to sterilize the jar lids, plus a pair of tongs and a spoon to scoop the jam into the jars.

Method

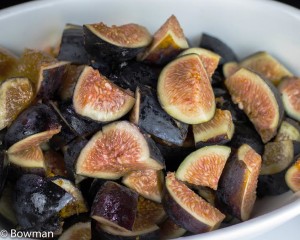
Wash, stem and chop figs into 6 to 8 pieces. Mix the chopped figs with the sugar, rosemary, lemon zest and lemon juice.

20150904 chopped figs- IMG-1989 with Frank edits

Let this mixture marinate while you sterilize the jars. Place the jars in the big pot, cover them with water to an inch above the jars. Add the tongs and spoon. Boil for 10+ minutes. Place the lids in a small saucepan and gently simmer for 10 minutes.

For more detailed information on preserving, read the instructions that came with your jars or go to www.foodinjars.com

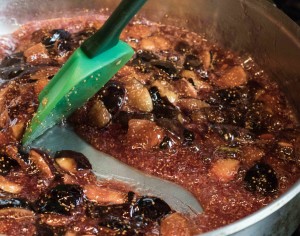
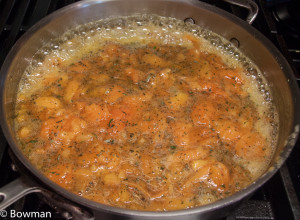
Now it’s time to make the jam. The sugar in the marinade should have turned into a syrup. Pour this fig mixture into the skillet and heat on medium high, stirring gently until it boils. Continue until the mixture thickens enough that a spoon dragged through the liquid leaves a swipe that does not immediately fill in. Take out the sprig of rosemary. Add the cognac and stir for a minute longer. The whole process will take 10 to 12 minutes.

figs cooked perfectly _MG_2079

Carefully take your jars out of the boiling water and spoon the jam into them.

Screw the lids on – not tightly – and return the jars to the hot water bath. Boil for 10 minutes. When you take the jars out of the bath for this final time, screw the lids on tightly and you’re done!

Chicken

Jewell’s Chicken

Jewel's chicken in pan_MG_1257

When I was little I was lucky enough to spend much of my time with a lovely woman named Jewell.   She spoiled me outrageously.  She was many wonderful things but most of my memories center around her cooking.  Her food was straightforward, bursting with flavor and, by today’s standards, extremely healthy.  When she and my mother worked on a recipe, magic happened.

I have finally come to realize I’ll never have scrambled eggs as good as Jewell’s because hers were saturated with love and memories of a happy childhood.

In my twenties I fell in love with cooking.  By that time Jewell was blind from diabetes.  We sent recorded letters back and forth.  She told me tales of my childhood … one memorable one  when I was about 3 yrs old involved her telling me to go get dressed for a walk.  I returned ready to go but all I had on was my cowgirl hat, my boots and my six shooter.  Needless to say, I was not let out the door.

Jewell’s chicken recipe is straight from her taped reminiscences.

 Jewell’s Chicken

Ingredients

4        chicken thighs

1c    all purpose flour

1½ t    salt

½ t    pepper

1½ t    smoked paprika, (use plain paprika if you have to)

3T    canola oil

3     sprigs of fresh rosemary cut in half, or 1T dried rosemary

3/4c    chicken stock

1/4c    white wine

Utensils

A 12” skillet that can go into the oven (black iron, if you have it), measuring spoons, a bag

Method

Preheat your oven to 350F.

Wash and dry the chicken thighs.  Make sure you get them really dry.  Put the flour in a baggie and with salt, pepper and paprika. Place the chicken in the flour bag one at a time and shake then remove to a plate.

Add the canola oil to your skillet and heat to medium high. The oil is hot enough when you begin to see smoke rising from the surface. I used to put a matchstick in the oil.  When it lit, which it does briefly,  the oil was ready.

Carefully add the chicken to the hot oil and brown on both sides. I use a splash guard whenever I fry something.  It keeps the kitchen from becoming a mess.

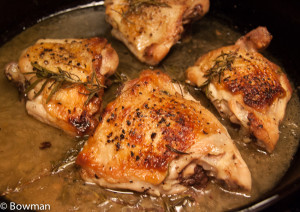
When the chicken pieces are well browned on all sides, remove the chicken from the skillet and pour off the oil that remains in the skillet.  If there are any burned pieces in the pan, wipe them out. Put the chicken back in the pan on medium high heat and pour in the chicken stock and the wine.  Add the sprigs of rosemary. Bring  to a simmer, then cover and place in the oven for 30 minutes.

If you want to make a sauce from the drippings, take the chicken out and put it on a warm platter.  Put the pan back on the burner over a medium high heat.  Scrape the bottom of the pan to loosen all the good bits (if any have burned, scoop them out). Reduce the liquid to half. Once the liquid reduces, add 4T of chilled butter in small pieces, whisking all the time. Add more stock or wine to get the proper consistency for a sauce. I’ve played around adding sauteed mushrooms and a splash of port for fun too.  Taste the sauce to make sure you have added enough salt and pepper.

Quick Jams

Apricot, Rosemary and Mint Jam

20150706 Apricot rosemary mint and red pepper jam-_MG_2571

Serendipity – don’t you love it when exactly what you want or need presents itself? I called a friend recently and asked if I could make bread and butter pickles with her. She makes wonderful pickles. She readily agreed but said “You know this takes all day and you’ll have 8+ pints of pickles.” I started backpedaling. I really did not want to spend all day doing this, nor did I want to store so many jars. I had a vision of friends saying with a false grin (grim grin) “Bless your heart, another jar of pickles.”

A few days later, while wandering around a cooking store I espied a cookbook by Marisa McClellan, “preserving by the pint – Quick Seasonal Canning for Small Spaces”. Hallelujah! I don’t buy many cookbooks anymore, but this one was just what I needed to figure out proportions for smaller batches of jams and vegetables. “Quick” is also right up my alley. Every recipe I’ve tried has been sensational.

Here is my take on one of Ms. McClellan’s jams: Apricot, Rosemary and Mint Jam. The jam is sweet and savory, with a bit of heat. Besides on breakfast toast, I use it this jam as a glaze on chicken, as a condiment with pork or lamb and on curry.

Making this only takes about 30 minutes. I often make a batch as I’m cooking dinner. Imagine finding a beautiful jar of apricot-flavored, spicy, savory, sweet, golden goodness in your pantry in January.

Note: When preserving, you don’t always have to have the perfect piece of fruit because it is cooked down and the flavors become more robust. So if an apricot is mealy but still smells good, use it.

Apricot, Rosemary and Mint Jam

Ingredients

2lbs    apricots

2c    sugar

3T    rosemary, finely chopped

2T    mint, finely chopped

3t    red pepper flakes, or 3t jalapeno, chopped finely

1T    fresh lemon juice

Utensils

A scale, a measuring cup, measuring spoons, and a potato ricer or some other way to mash the apricots; a 12 inch skillet; 4 one-pint preserving jars with lids; a stock pot.

Method

Prepare the canning jars and lids according to the manufacturer’s directions.

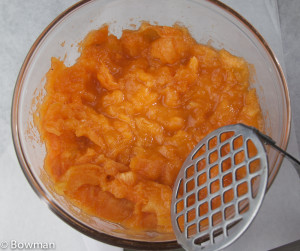
Pit the apricots and put them in a large bowl.  Mash until pulpy – it is ok to have some small chunks.  I use a potato ricer to do this.

20150706 Apricot Rosemary and Mint Jam_MG_1959Add the apricot, rosemary, mint, sugar, and pepper to the skillet and cook on medium high, stirring occasionally until the mixture reaches a boil. Add the lemon juice.

Cook, stirring gently until the back of a spoon remains coated when you lift it out of the liquid.  You can also check for doneness by drawing your spoon across the middle of the mixture.  If the mixture does not immediately fill in the swath, it’s ready.

20150706 Apricot Rosemary Mint Jam cooking on stove

Carefully fill the jars to within ¼ inch of the rim. Screw on the lids and place the jars back in the pot that you used to sanitize them.  Bring the water to a boil and cook the jars for 10 minutes.  When you take the jars out, you should hear a pop sound. Again, follow the manufacturer’s directions. The jam keeps for 3 weeks in the refrigerator if you are not comfortable with preserving.  This Apricot, Rosemary and Mint Jam has not lasted 3 weeks in my house yet.

Tips, Vegetables

Roast Jalapenos in Minutes

Roast a pepper quickly! Go to smallspacecooking.com to see how and for a delicious Cool Avocado and Cucumber Soup with roasted jalapeños. #pepper #jalapeño #roastedpepper #roastedjalapeños #quickroastedpepper

Roast Jalapenos in Minutes

Here’s a tip on how to roast jalapenos in minutes. You can use this method for roasting all kinds of peppers, including bell peppers.

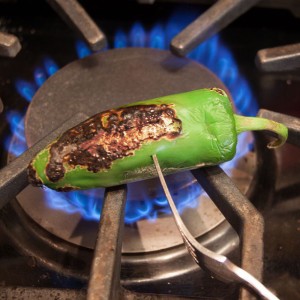
If you have a gas burner – turn it to medium high to high. Spear the pepper with a fork.  Make an insulating handle for the fork because it will get extremely hot.  I use a silicone handle cover made for my black iron skillets.

Place the jalapeno in the flame until the skin chars.  Turn it so that every side is charred.  When done put the roasted jalapeno in a bag or a bowl with a top and let it steam while it cools off.   When cool, in about 10 minutes, rub the blackened skin off with a paper towel and discard.

If you don’t have gas burners, turn you oven on broil and place the peppers in a pan in the upper part of your oven.  Watch carefully.  Turn the peppers so every side gets charred. When done put the roasted jalapeno in a bag or a bowl with a top and let it steam while it cools off.   When cool, in about 10 minutes, rub the blackened skin off with a paper towel and discard.

If you have time you can slow roast the peppers in a 400F oven for 30 to 40 minutes.  When they are charred all over follow the directions for cooling them that are above.

That’s how simple it is to roast jalapenos in minutes!

Note:  When chopping or seeding hot peppers you may want to wear gloves or be very careful that the oil in the pepper does not get on your hands.  It will not wash off immediately and if you forget and rub your eye, it really hurts.

Appetizer, Fish

Gravlax with Tequila

20150706 Gravelox ingredientsGravlax with Tequila

Gravlax is salmon that has been cured with, in this case, salt, tequila and herbs. It is easily prepared and stunning to serve. It’s one of my favorite dishes to take to a party or as a hostess gift – it always gets oohhhs and aahhhs.  Its beautiful color and delicate taste makes it a perfect hors d’oeuvre or first course. With a bagel and cream cheese, I like it for breakfast too.  This version came from my dear friend Audrey who was head chef at the Garden Restaurant in Philadelphia. We have such fun cooking together.  I always learn a lot!

Most of the time I serve gravlax thinly sliced in generous bite size pieces, along with small forks or a toothpick. Or I put the gravlax on a thin slice of pumpernickel or rye bread with a touch of butter, Neufchatel or Dijon mustard and a sprig from one of the herbs used in the marinade.

Preparation could not be simpler. The tequila and cilantro give the gravlax a southwest flare.

Note: The salmon has to cure in the refrigerator for 24 to 36 hours before serving.

Ingredients

2 to 3 lb of salmon cut into two equal, flat pieces.  Make sure it is scaled and deboned. You’ll make a sandwich with two salmon pieces acting as the bread and the herb mixture as the filling.

The cure:
1 c     kosher salt
1 c     dark brown sugar
4 T     grated lemon rinds (you will need 3-4 lemons)
1 T     minced shallot or 3 T fresh chives
3/4     bunch of cilantro, chopped
¼       bunch of dill, chopped
¾       bunch of flat-leaf Italian parsley, chopped
a few grinds of pepper
2 T     tequila

Method

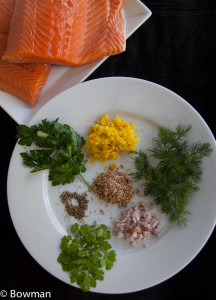
Mix sugar and salt.  Wash, thoroughly dry and chop the herbs and place in a bowl with the other dry ingredients. That’s it – the dry rub/cure is ready.

Rub your fingertips over the salmon to make sure it is completely deboned.  Often I find the small pin bones have not been removed.  A pair of needle-nosed pliers will remove them easily.  I leave the skin on.20150729 Gravlax herbs on salmon_MG_1379.CR2

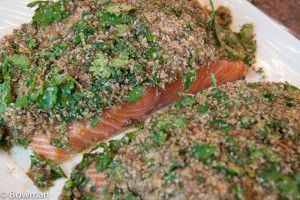
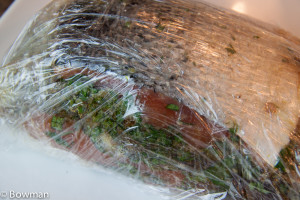
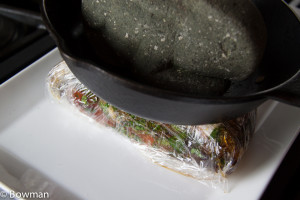
Rub the salmon with the tequila. Pack the herb mixture onto the non-skin side of both pieces of salmon, then slap the two salmon pieces together with the skin on the outside to make a salmon sandwich with the herbs as the filling.  Wrap with cling wrap very tightly.   Put on a tray under a heavy weight, such as a foil-wrapped brick. I use a black iron skillet with a concrete statue from my garden on top.20150729 Gravlax wrapped_MG_1387.CR2

Place the weighted salmon on a tray in the refrigerator for 36 hours, turning the gravlax every 12 hours.

20150729 Gravlax weighted_MG_1396.CR2

After 36 hours unwrap the salmon, rinse off the cure and pat dry. Cut the gravlax like smoked salmon – cut into thin slices, on an angle. The gravlax needs to be refrigerated. Eat within a few days.